
This plugin adds DKIM signature to all outgoing emails if enabled.
Mail icons created by Freepik - Flaticon
Installation via Command Line
php artisan plugin:install VojtaSvoboda.DkimSign
Installation
1) Generate DKIM public and private keys. You can do it for example here: https://tools.socketlabs.com/dkim/generator
If running an application on a subdomain, enter subdomain.domain.tld in the domain field, otherwise enter domain.tld.
2) On your domain create TXT DNS entry with the public part of the key, for example a record with name (domain name):
dkim._domainkey.subdomain.domain.tld
Where dkim is the selector used while generating the key in step 1.
The record value is:
v=DKIM1; k=rsa; p=<public key>
Check DNS with this tool: https://mxtoolbox.com/supertool3 Type the domain name and select DKIM Lookup. Domain should be in the format:
subdomain.domain.tld:selector
For example:
example.com:dkim
3) Copy the private key to some file, for example, storage/app/uploads/protected/dkim/private.key
!!! This file should not be accessible from the web so we will save it to a protected directory !!!
4) Setup plugin by .env file:
Below you can see all possible variables with default values:
DKIM_ENABLED=false
DKIM_PRIVATE_KEY=
DKIM_DOMAIN=<config.app.url>
DKIM_SELECTOR=dkim
DKIM_PASSPHRASE=
For my example, it is enough to set:
DKIM_ENABLED=true
DKIM_PRIVATE_KEY=storage/app/uploads/protected/dkim/private.key
A domain is by default taken from config app.url. A selector is by default dkim. A passphrase is empty by default.
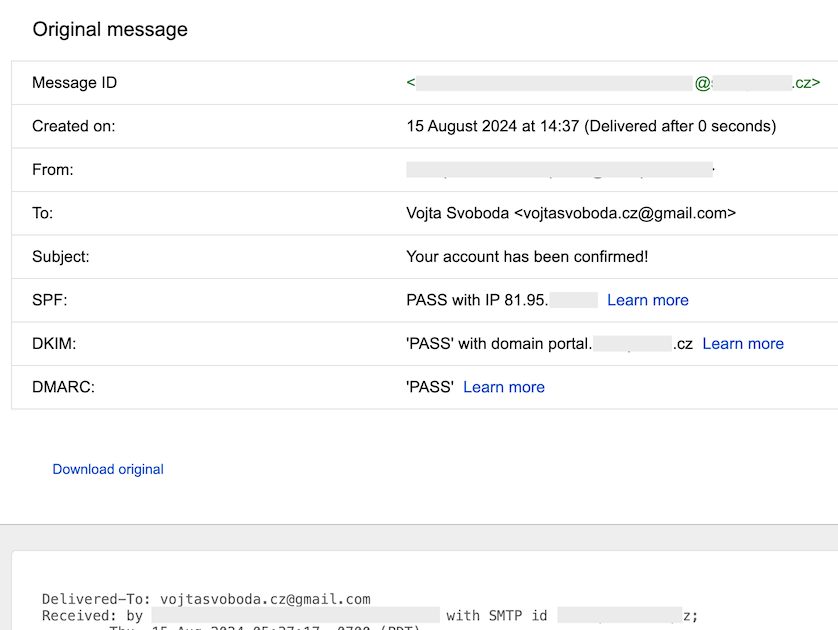
5) Send testing email to Gmail recipient where you find Show original in the mail detail and there you should see: DKIM PASS.
-
This plugin has not been reviewed yet.
-
| 1.0.0 |
First version of DkimSign Aug 15, 2024 |
|---|