

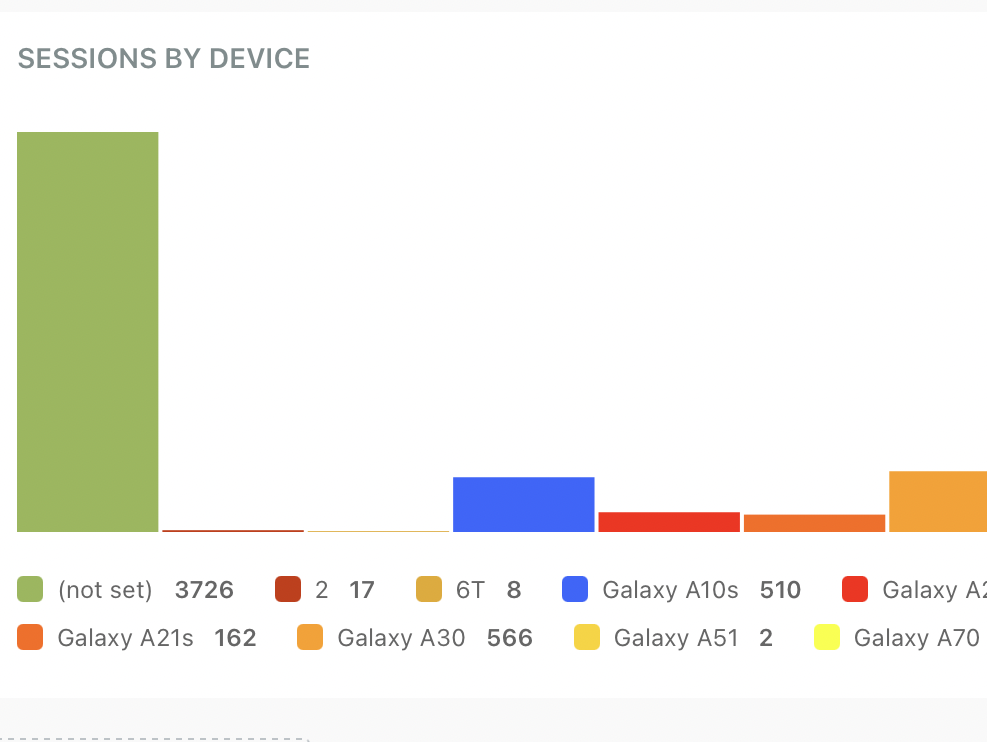
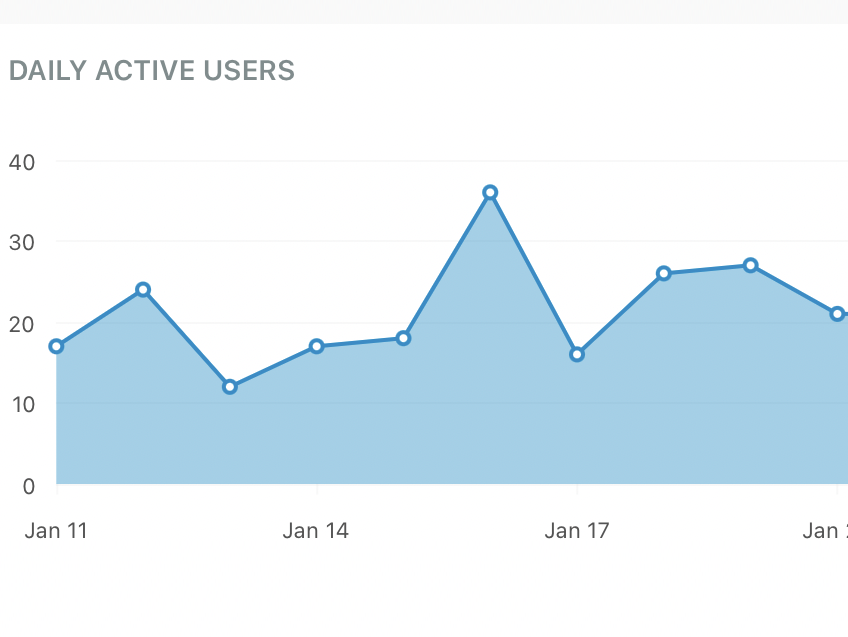
This plugin is a fork of the Google Analytics OctoberCMS plugin. The main difference is that unlike that plugin, this one uses Google Analytics Data API (GA4) which gives both web and app data. Secondly, this plugin abstracts the browsers, top pages, traffic goals, traffic overview, and traffic sources report widgets into a line, bar, pie, and percentage charts (credit to Scott Bedard for this).
Configuration
Configure the API
To get started using Google Analytics API, you need to first create or select a project in the Google Developers Console and enable the API. Using this link guides you through the process and activates the Google Analytics API automatically.
Alternatively, you can activate the Google Analytics API yourself in the Developers Console by doing the following:
-
Open the Credentials page.
-
Select the Overview menu item and enable the Analytics API.
In either case, you should end up on the Credentials page and can create your project's credentials from here.
Create a client ID
-
Open the Service accounts section of the Developers Console's Permissions page.
-
Click Create service account.
-
In the Create service account window, type a name for the service account, eg:
OctoberCMS Analytics. -
Place a tick in the box Furnish a new private key and select JSON for the Key type.
-
Then, click Create.
-
A
.jsonfile will be generated, this is the private key for your account. Accept the download and save it to your computer. -
Click Close.
-
You should see an email ending with
iam.gserviceaccount.com, if not select the Permissions tab. Copy this address to your clipboard.
Configure Google Analytics
-
In a new tab, navigate to the main Google Analytics site and select the property you want to track.
-
Click the Admin main menu tab at the top. Select the Property > User Management menu item.
-
Paste the email address from the clipboard into the field Add permissions for and make sure the permission is set to Read & Analyse. Click Add.
-
Click the Admin main menu tab again and select Property > Property Settings from the menu. Copy to your clipboard the Property ID (should be a number).
Configure October back-end area
-
Open your October back-end administration area and open Settings > Google Analytics.
-
Paste the Property ID from the clipboard into the field Property ID.
-
Upload the previously downloaded
.jsonprivate key file to the Private key field. -
Specify the Web Measurement ID (eg
G-G1MMEAPS5) and Domain name values if you are going to use the plugin's built-in tracking component. To find this code, select Admin > Data Streams > Web from the Google Analytics menu. -
If Tracking is not working initially, enter the value
autofor the Domain name field. This is a fix for newborn Google Analytics accounts.
Installation via Command Line
php artisan plugin:install Mohsin.GoogleAnalytics
Adding the tracking code
Using the tracking code provided by the plugin is optional - the reporting part does not depend on whether you track your traffic with the built-in tracker or with a custom code generated by Google Analytics tools.
To add the plugin's tracking code to your website just drop the Google Analytics Tracker component to your CMS layout and add this code to the layout code after the page tag:
{% page %}
{% component 'googleTracker' %}
Troubleshooting
Fix for Windows / XAMPP
cURL error 60: SSL certificate problem: unable to get local issuer certificate
-
Follow this link: http://curl.haxx.se/ca/cacert.pem and save it in a file called
cacert.pem. -
Open your
php.inifile insert or edit the following line:curl.cainfo = "[pathtothisfile]\cacert.pem"
-
Restart Apache
Popup message simply saying "error" when trying to add the JSON key file.
Some ad-blockers (such as Chrome's uBlock Origin extension or Firefox's own built-in algorithms) may prevent the uploading of the JSON file key. Disabling these, or whitelisting the October CMS website, may resolve this issue for you.
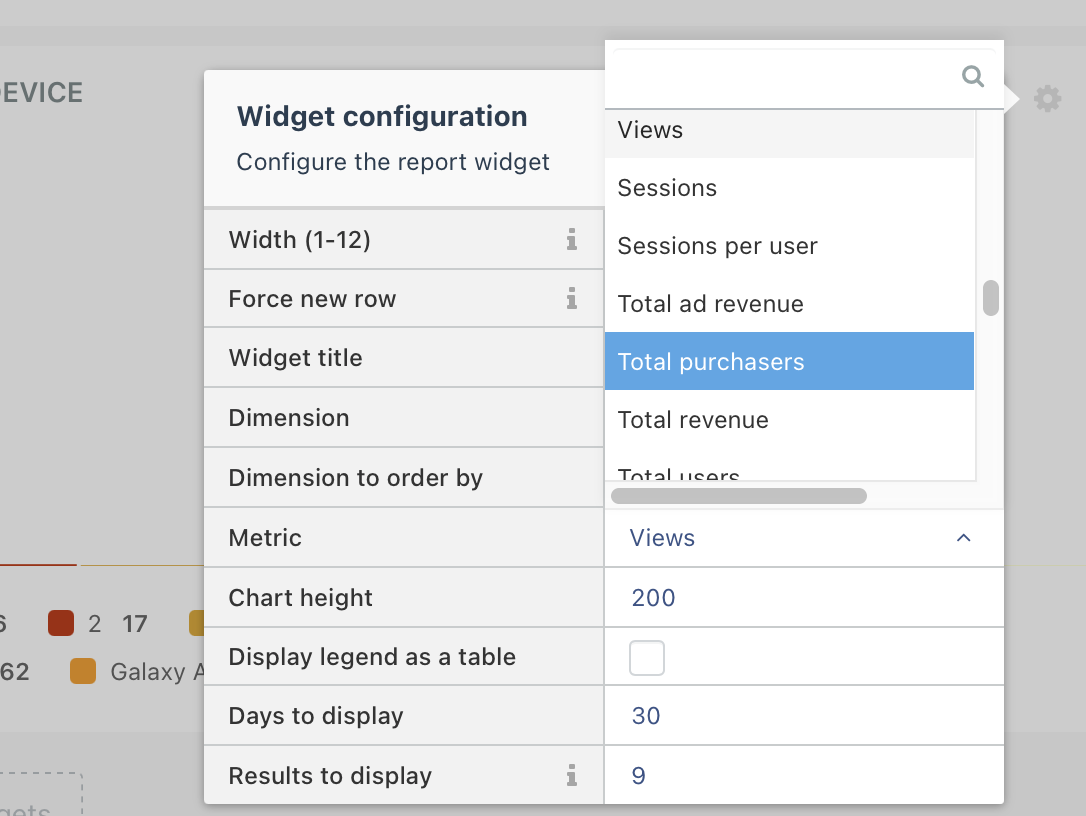
Newly added dimensions/metrics do not show up in the widget properties dropdown
If you added custom dimensions/metrics or if Google did so, it would normally take 10 days for those to appear as these are cached every 10 days to speed up dashboard widget loads. If you need this to be refreshed immediately, you can manually clear the cache by running the artisan command:
php artisan cache:clear
-
This plugin has not been reviewed yet.
-
| 1.0.3 |
Ability to exclude the not set dimension Mar 08, 2021 |
|---|---|
| 1.0.2 |
Added Cache for dimensions and metrics Feb 14, 2021 |
| 1.0.1 |
First version of plugin Feb 10, 2021 |