

Have you ever wanted to add an extra layer of authentication to your October website? You can do this now by installing this plugin and enabling Two Factor Authorization.
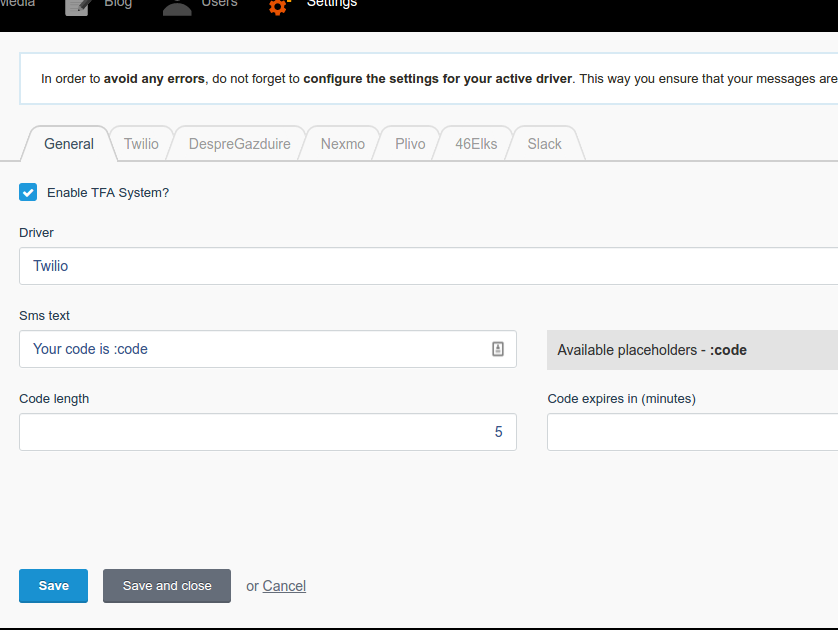
After instalation, you have to go to the settings and configure this plugin to use the desired gateway or driver and then enable Two Factor Authorization.
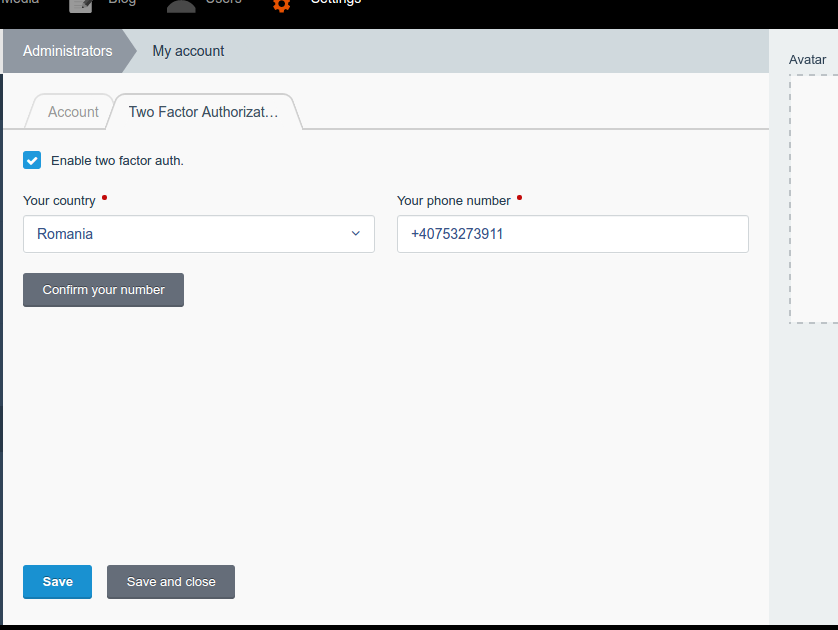
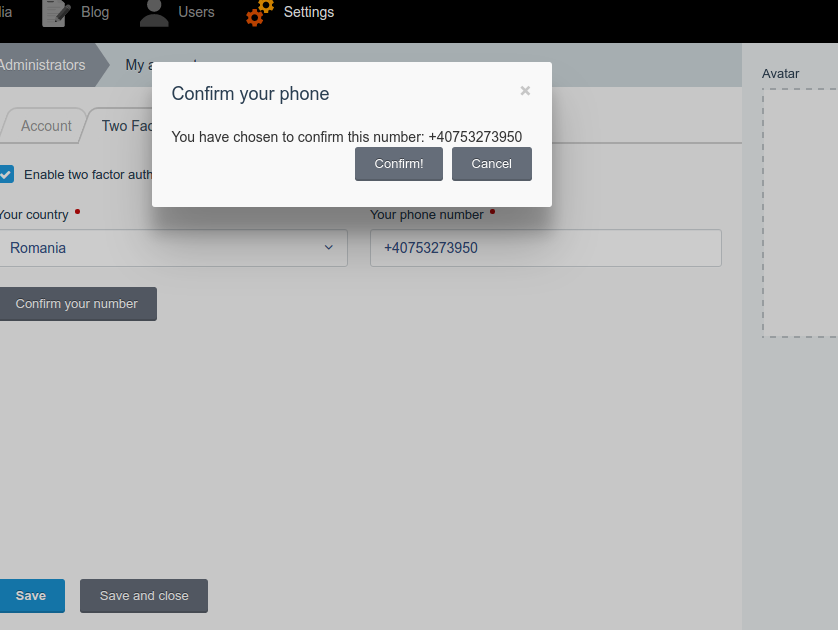
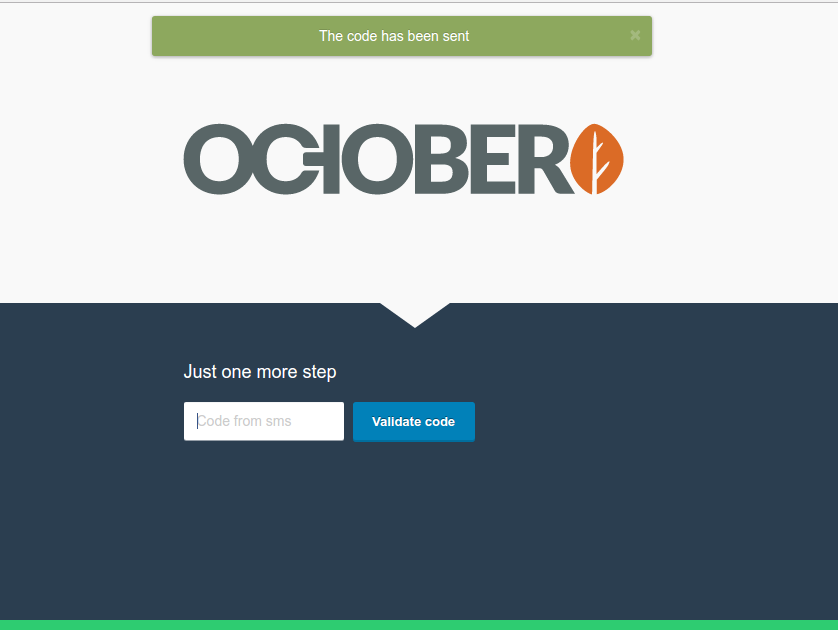
When this plugin is active, every user has an option in My Account page to enable Two Factor Authorization for his/her's account. The user then has to enter his mobile phone number and country. After saving the settings, the user has to confirm the mobile phone number entered in the settings. Validation works by sending an sms number to the number and user has to enter that code in the pop-up.
By default, this plugin works with the following drivers:
- Log (for development)
- Twilio
- Nexmo
- Plivo
- 46elks
If you have any requests for a driver (for example a service in your country), write to us in the support section.
This plugin works with third parties APIs and tries to catch as many errors, but there might be errors that come from a third party service. If you encounter any such errors, write in the support section.
Developers can easily create a custom driver for this plugin. For documentation on how to do that and a working demo for a Slack driver, read the documentation section.
For any bugs, feature requests and so on, use the support section.
Planned features:
- Force all users to use Two Factor authorization option
- Add more bundled drivers for SMS gateways
- Add more customization options
Installation via Command Line
php artisan plugin:install Filipac.TwoFactor
How to create a driver
It is very simple to create a custom driver for Two Factor in order to send messages using your own service or one that is not bundled in the core drivers.
All you have to do is to use a plugin in October (a new one or existing one). In this plugin you have to create a class that will take care of sending the actual message. This class has to implement the \TwoFactor\Interfaces\SenderInterface interface that has two methods:
getDriver()- this is here you make a new instance of the dependency you use for your driver. For example, if you use a driver to send the message in Slack, here you make a new instance ofnew SlackBotand then you send it.send($to, $message)- this is the function that sends the message. As you can see, this function has two parameters: $to - this is the number where you would send an SMS and message that includes the message that was set in the plugin settings.
After the sender class is ready and implemented with those two message, you can go on and register the sender class into the plugin. To do this, in your plugin.php you should make (if you don't have it already) the register() function and in this function listen to an event called filipac.twofactor.drivers. In this event you would return a single array with two keys: class that is the full class name of the driver you created and name - the name of the driver. Below is an example of a working register function:
public function register()
    {
        \Event::listen('filipac.twofactor.drivers', function () {
            return [ 'class' => 'Demo\Driver\DemoSender', 'name' => 'Slack Gateway' ];
        });
    }
Also, make sure that the plugin you made (or already had) requires the main plugin in order to avoid errors:
protected $requires = [ 'filipac/TwoFactor' ];
This is the minimal configuration you have to make in order to have a custom driver.
Adding settings and validation rules
For a driver you might want to add custom configuration fields and form rules in the Settings page. In order to do this, you should listen to another event in the register function, like so:
\Event::listen('filipac.twofactor.fields', function () {
            return static::class;
        });
After you listened to this event, you can go further and implement another function called fields. This function should return an array with fields to include in the form. This configuration is detailed in the October documentation - here.
public static function fields() {
        $arr                 = [ ];
        $arr['slack_sid']      = [
            'label' => 'SID',
            'tab'   => 'Slack',
            'span'  => 'auto'
        ];
        return $arr;
    }
Now your fields will appear in the settings page of the Two Factor plugin, in the tab you specified. You can add custom validation rules and messages by adding another function called validation. Quick demonstration:
public static function validation() {
        return [
            'rules' => ['slack_sid' => 'required_if:driver,'.DemoSender::class],
            'messages' => ['slack_sid.required_if' => 'Required if msg']
        ];
    }
The code above adds a rule for the field slack_sid that says that this field is required if the driver field is set to DemoSender class. In the messages array, you include the custom messages for the rules you want. Read more about validation service on the October documentation.
You can find a fully-working plugin made for demonstration that posts the message on Slack on Github filipac/demo-driver
| 1.1 |
Updated the plugin to work with latest October Build Jan 17, 2019 |
|---|---|
| 1.0.1 |
First version of TwoFactor Jul 08, 2016 |