
Description
We are happy to offer You a very simple and flexible plugin to create communities or simple subscription sites via the Octobercms system, with an automatic change of order status and addition of user Rights with one click of the mouse. Moreover, there is an automatic warning if the subscription is close to expiring.
Requires Plugins - Frontend Roles Manager plugin by TreeFiction, and RainLab User plugin
Features
- Automatic tax deduction when saving products
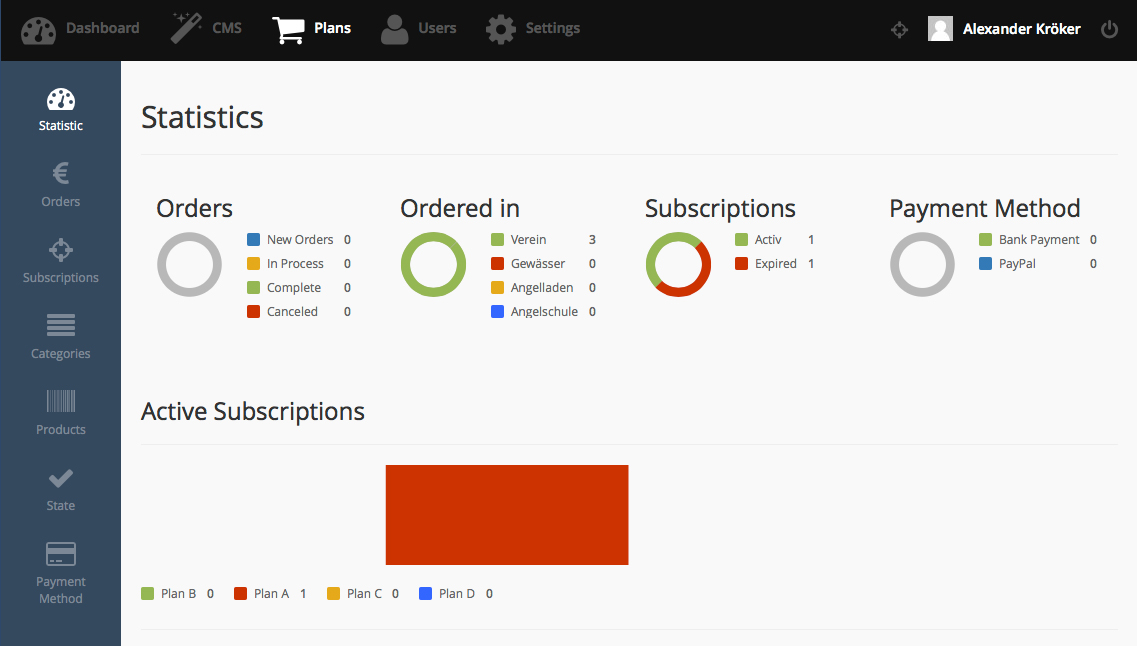
- Automatic status change
- Automatic adding of the subscription
- Notice 14, 7, 5, 3, 2, 1 days before the subscription expires
- Basket
- Tax settings
- Fast install
- Fast and flexible setup
- Addition of various statuses
- Individual classes for categories and products
- Bank Payment System
- PayPal Payment System with IPN Notification
- 3 System language (English, Russian, German)
Available languages
- en - English
- ru - Russian
- de - German

Installation via Command Line
php artisan plugin:install Afw.Plans
Documentation - Backend
In order to install our subscription system, please make sure that You have installed the following plugins:
Frontend Roles Manager plugin by TreeFiction, and RainLab User plugin
After installing these plugins, You can install Plugin Plans and get right to its main setup. Please go to settings / Plans / Settings and fill in the empty boxes in the Seller tab. Then, proceed to the Taxes tab and set your tax system.
After this, save your settings and go to the users’ plugin, and add permissions and roles for the users.
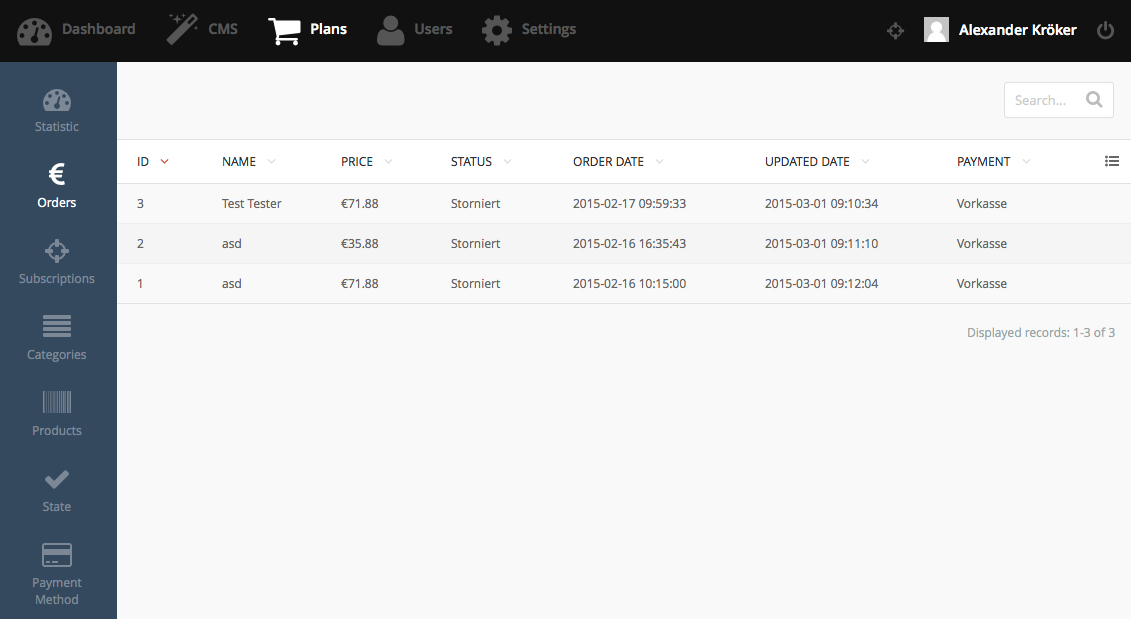
Then, go to plugin Plans / Statuses and add 5 Different statuses:
Attention, this is very important – Statuses must be added in the following order:
- New
- Processing
- Paid
- Ready
- Cancelled
After this, go to the Payment tab and add 1 payment option Then, go to the Categories tab and add A few categories. After adding the categories required for You, go to the products section and add a few products.
When adding products, it is required to fill in the Role Price and duration.
After adding the products, let’s go once again to the main system settings Settings / Plans / Settings / Sub
Set the categories and roles, the role that You choose for a category will be automatically added to the user after their paid subscription ends.
CMS Documentation
Go to the CMS section and add a new page Categories, then drag the Categorien component through other components, save and check if everything is working.
You must set up the user plugin authorization and registration
Create another page and name it Category, add the Kategorie component to it. Make sure to pay attention at the settings of the component itself. This page is only accessible to users, therefore choose a pre-direction in user settings.
In the URL field, please write the following
/:slug
Go to the categories page and choose one of the categories, if You see the products, then You have done everything correctly.
Create another page in the CMS and name it cart, and also add the Warenkorb component.
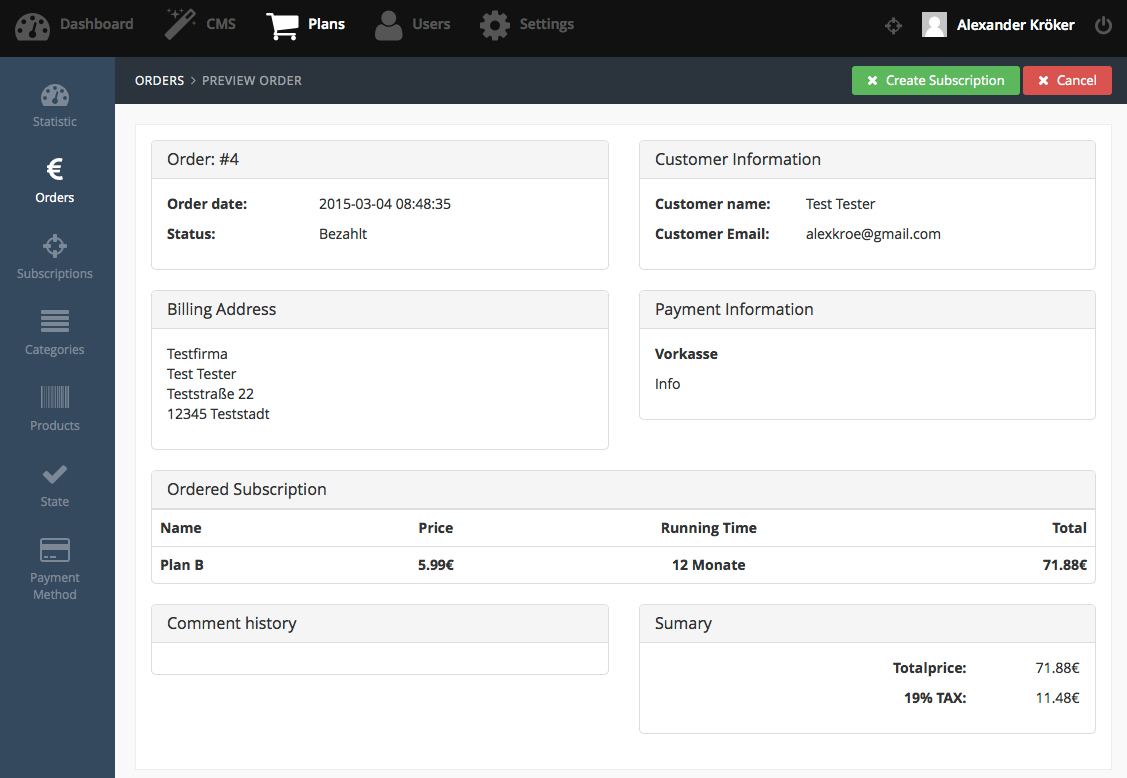
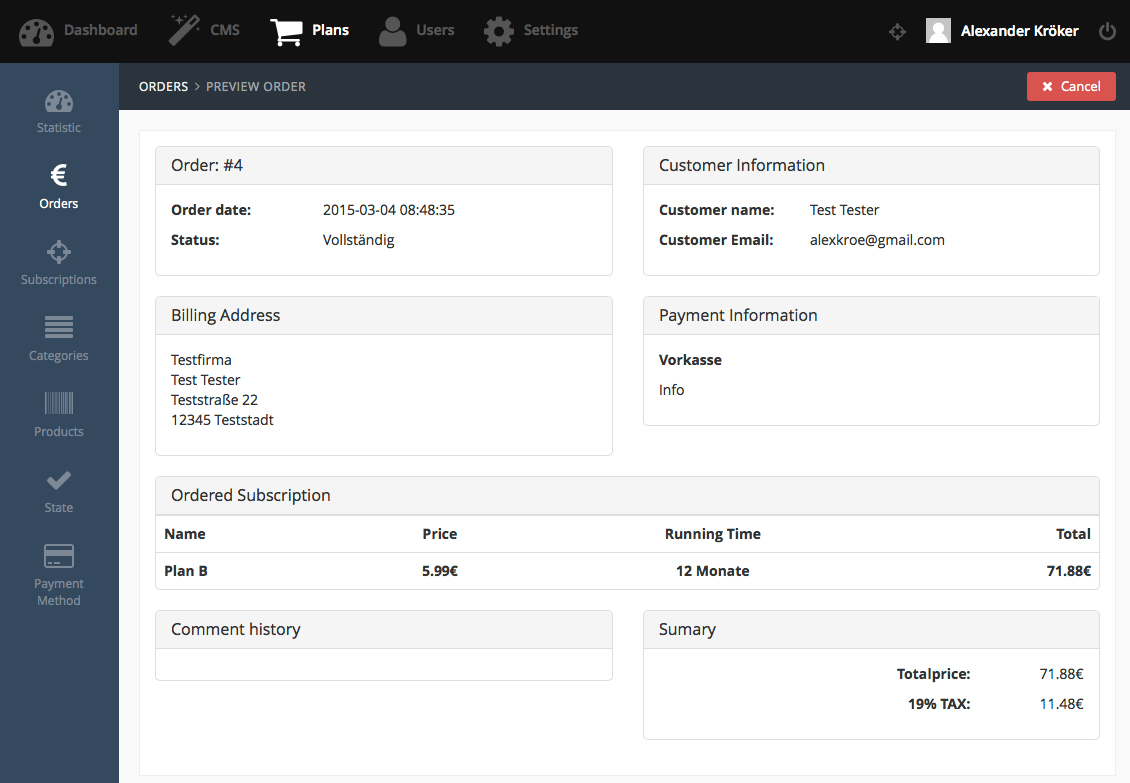
The next page to be added is Checkout, its component is called Zur Kasse. Lease pay attention to the component’s settings. Then, try to make an order and make sure everything is working.
After this, create another page in the CMS, My orders and add the corresponding component Bestellungen
Save and create another page My order together with the component and pay attention to the URL
/my-orders/:id
Connecting the PayPal payment system
In your PayPal account, go to profile settings.
Choose “Settings for instant payment notification”, activate this function and enter the following link into the notification link:
http://www.example.com/paypalnotify?action=ipn
Choose “Website payment Optionen”, activate the automatic notification and enter the following link lower:
http://www.example.com/paypalnotify?action=success
Activate the “transfer of payment data” function, save and copy the “Identity Token”
Go to the administrative part of Your website, choose the Plans plugin and go to the payment methods section.
Create a new payment method and name it “PayPal”, then go to the “PayPal” tab and fill in the following fields:
PayPal Konto - Email address of Your PayPal account
PayPal Token - identity token that You copied from Your PayPal page
Attention: if You fill in the PayPal Testkonto” and “PayPal Testtoken” fields, the system will automatically input the PayPal test site
http://www.sandbox.paypal.com
Now go to the “CMS” section and create a new page, the link must look like this:
/paypalnotify
Then go to the components and find the “Plans” plugin, and connect the “PayPal Component” to the page contents
Go to the actual code of the plugin “Plans” -> components -> Checkout.php and change the link on 224 to the link of Your site.
And finally add the last page My subscriptions together with the component.
Don’t forget to look at the email setting, there are a few templates. Please be sure to study the Admin component panel in detail.
The component is ready.
Leave Your comments.
-

zack
Found the plugin not useful on 18 Aug, 2015
Settings language is German. You should know German to understand even settings page.
-

Web Master
Found the plugin useful on 13 Jun, 2015
It's Good plugin if you want to support membership on your octobercms website. and contain very good functions. but there are big problem if your language is not german or dutch and you're not coding skills it's better your don't purchase this plugin. because, till know email template and contents of plugin is not translatable from lang file! and your should translate them manually with your IDE.
-

LEXcode author
Replied on 14 Jun, 2015
E-mail templates are not transferred specifically to each customize them yourself, it is done in the settings of Email Bekhend. Nor were translated and bills, because that everyone tries to score to make your design.
-


| 1.1.2 |
PayPal Payment system with IPN Notification Mar 11, 2015 |
|---|---|
| 1.1.1 |
Added the Russian language Mar 01, 2015 |
| 1.1.0 |
Insert Statuses data Jan 27, 2015 |
| 1.0.9 |
Create Abo table Jan 27, 2015 |
| 1.0.8 |
Create Product table Jan 27, 2015 |
| 1.0.7 |
Create Categorie table Jan 27, 2015 |
| 1.0.6 |
Create Payment table Jan 27, 2015 |
| 1.0.5 |
Create Status table Jan 27, 2015 |
| 1.0.4 |
Delete Orderitems table Jan 27, 2015 |
| 1.0.3 |
Create order table Jan 27, 2015 |
| 1.0.2 |
Create cart table Jan 27, 2015 |
| 1.0.1 |
First version of Plans Jan 27, 2015 |