Setting up a local October CMS environment with Vagrant [configuration tutorial]
Posted in Tutorials on Aug 08, 2016
In this series of posts we'll be exploring some options of running October across various environments. This will cover local development configurations, setting up staging environments and also production servers. We'll be using different hosting services including load balanced cloud solutions.
Any time we start a new project, we must make sure that our workstation meets the project's system requirements. Does it require a newer PHP version? Should we install Redis, memcached or other services?
Today there are many ways of configuring your local environment. These include running services directly in your OS, using virtual machines or even using Linux containers. Each option has its pros and cons, so we'll try to explore some possible options to make the choice easier.
In this article we'll be installing and configuring October with Vagrant. If you haven't heard of Vagrant before, it's a tool that automates the creation and configuration of virtual environments. Vagrant uses Oracle VirtualBox, a piece of free virtualization software that allows anyone to run guest operating systems in their host OS. The guest operating system can run all the services required for your project such as Apache and MySQL. Vagrant makes the configuration process nice and simple, so that you can have a guest system up and running in minutes.
Here are some advantages of using Vagrant:
- The project environment doesn't depend on the host machine OS features. The same project configuration can run on Windows, OSX and Linux.
- You can create many different configurations for experiments or for different project system requirements. Each configuration could have its own set of services.
- The host OS does not get polluted with libraries and services.
- There are many pre-configured Vagrant images (boxes) to choose from.
- Vagrant configuration is a text file, which allows you to deploy the same environment on different computers or share it with your team members.
- Very easy to use.
There are some disadvantages, compared to running services on the host OS or in Linux containers:
- CPU and memory overhead.
- Virtual machine images take up lots of disk space.
With that said, Windows and OSX doesn't support Linux containers directly. They require a virtual machine to run them, which in turn creates the CPU and memory overhead anyway. We will review containers in another article.
Installing VirtualBox and Vagrant
The installation process for VirtualBox and Vagrant is straightforward. They both have a nice installer and great documentation.
-
Step 1 - Install VirtualBox first. You can find a package suitable for your operating system on this page: https://www.virtualbox.org/wiki/Downloads.
-
Step 2 - Download Vagrant using their website https://www.vagrantup.com/downloads.html. Choose the latest version for your operating system and just follow the instructions.
When you finish the installation, it will introduce some new command line tools that can be used to create your first Vagrant environment.
How the environment is organized
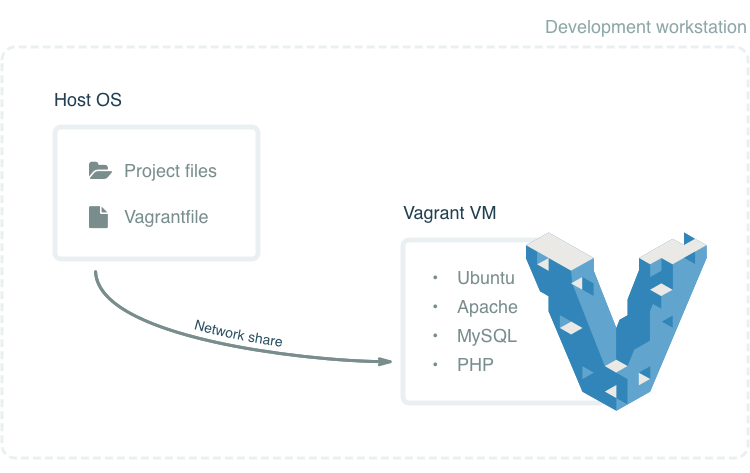
Although the web server and other services run in Vagrant's virtual machine (VM), the actual project files are stored on your host machine. This means you can use your usual tools for editing them. You can also use git or any other version control system for managing the project files. The VM will have network access to the project files on the host machine. This is a safe and useful approach to configuration, allowing you to have full control over the project files. You can even replace the runtime environment (use another VM) without moving any your files.
You can access your October website by the IP address or host name of the Vagrant VM (see below). For managing October database contents you can use any tool installed on your host machine, then connect to MySQL instance running on the Vagrant VM.
Setting up Vagrant environment
Vagrant virtual machine images are called boxes. There are many Vagrant boxes pre-configured for running PHP applications, including Laravel's official box Homestead. For this tutorial we will use Scotch Box. This box includes everything you need to run October:
- Ubuntu 14.04 LTS
- PHP 5.6
- cURL
- GD and Imagick
- Composer
- MySQL
- and more (see the full list on the website).
Create an empty directory for your project. In this tutorial we will use a directory called october-demo. Go to this directory and clone the Scotch Box repository with git, or alternatively you can just download and extract the archive from GitHub.
git clone https://github.com/scotch-io/scotch-box.git .This operation will create two files and public directory in the project directory:
/public
README.md
Vagrantfile
The virtual machine is now ready for its first launch. Use the vagrant up command to start it:
vagrant upThe first run will take some time, this is because it downloads the Scotch Box image from the repository. This will happen only once, all other Scotch Box projects will reuse the existing image.
==> default: Importing base box 'scotch/box'...
==> default: Matching MAC address for NAT networking...
==> default: Checking if box 'scotch/box' is up to date...
...
==> default: Configuring and enabling network interfaces...
==> default: Mounting shared folders...
By default Scotch Box uses the IP address 192.168.33.10 for new virtual machines. Open this address in a browser to make sure that the machine works:

Keep reading to learn how to change the default IP address and assign a custom host name to your Vagrant VM.
Installing October into the virtual machine
Depending on your project needs, you can clone the October repo, download the web installer from October home page or install it using the command line. We will show you how to install it with the command line as it is more aligned with Vagrant operations.
Assuming that you're still in the project directory and Vagrant is running, run vagrant ssh to connect to Vagrant VM console:
october-demo$ vagrant ssh
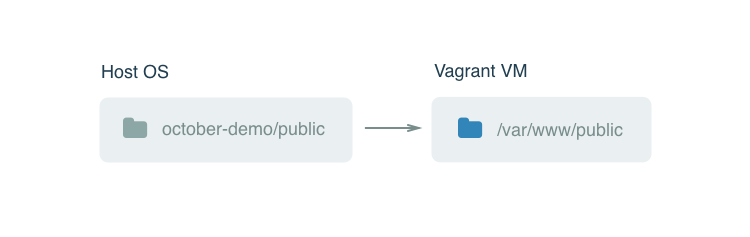
Welcome to Ubuntu 14.04.3 LTS (GNU/Linux 3.13.0-55-generic x86_64)In the VM console change the directory to /var/www/public.
cd /var/www/publicThis directory is mapped to the public subdirectory in project directory on your host OS. Directory mappings are configured in the Vagrantfile.
Delete the index.php file from the public directory, you can do it either from your host machine, or from Vagrant VM:
rm index.phpNow everything is ready for installing October. Execute the following command in Vagrant VM console to download and launch the installer:
$ curl -s https://octobercms.com/api/installer | php
All settings correct for installing OctoberCMS
Downloading OctoberCMS...

OctoberCMS successfully installed to: /var/www/public
Congratulations, October is now installed! Open http://192.168.33.10/ to see the demo theme.
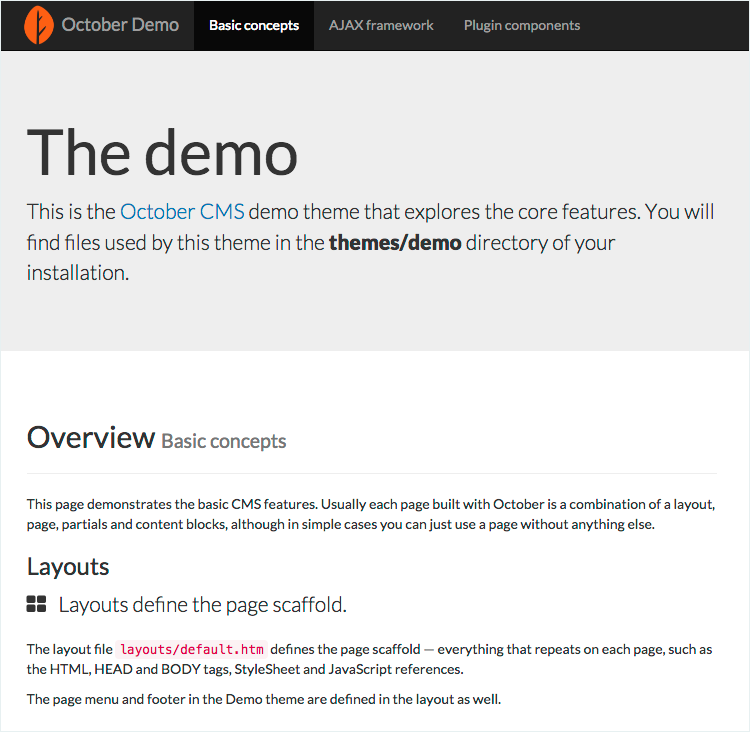
Currently your October installation doesn't use a database and can only be used in flat-file mode. If you wish to have all the features, including the back-end interface, you should continue configuring the application.
In the Vagrant VM console run:
php artisan october:installThis will start the configuration wizard which will guide you through the configuration steps.
Database type:
  [0] MySQL
  [1] Postgres
  [2] SQLite
  [3] SQL Server
Choose MySQL database type and use the following settings to configure the MySQL connection (these settings are provided by Scotch Box by default):
- MySQL host: localhost
- MySQL port: 3306
- Database name: scotchbox
- MySQL login: root
- MySQL password: root
After configuring the MySQL connection, set up your admin user account. You can use any values for the username and password, just make sure to remember the password.
For the application URL specify http://192.168.33.10/ (you can change it later).
The advanced options can be configured later, so feel free to answer "no" to "Configure advanced options?" question. After you finish the installation you can log into the back-end via http://192.168.33.10/backend with the username and password you provided during installation.
Tuning up filesystem performance
We have noticed that the default file sharing configuration provided by Scotch Box is slow on some operating systems (in particular on OSX) which significantly affects October performance. It also causes some CMS caching issues, when October can't detect whether a CMS template file was changed and invalidate the cache.
The problem can be fixed by updating the Vagrantfile in your project directory. The solution is tested only in OSX, please let us know if you have the performance problem on Windows and whether the solution worked for you. On our development MacBooks this update reduces the request handling time by more than two fold.
First you need to exit Vagrant VM console by executing exit command.
$ exit
logout
Connection to 127.0.0.1 closed.
This command returns you to the host OS console. You should stop Vagrant before making any changes in the configuration. Run vagrant halt command to stop Vagrant:
$ vagrant halt
==> default: Attempting graceful shutdown of VM...
Open Vagrantfile in a text editor and find this line:
config.vm.synced_folder ".", "/var/www", :mount_options => ["dmode=777", "fmode=666"]Replace it with
config.vm.synced_folder ".", "/var/www", nfs: true, :mount_options => ['nolock,vers=3,udp,noatime,actimeo=1']Save the file and start Vagrant with vagrant up. This time it might ask you to enter your system password in order to mount NFS shared folders. Once running, refresh October page (http://192.168.33.10).
Setting up a host name
If you don't like accessing your October website by the IP address you can assign a custom host name to it. You can also change the default IP address. The IP address is set in Vagrant file:
config.vm.network "private_network", ip: "192.168.33.10"Always stop Vagrant before you make any updates to the Vagrantfile.
To assign a host name to your October installation, open the hosts file in a text editor. Its location depends on the operating system. In Windows it's usually in C:\Windows\System32\Drivers\etc\hosts. On OSX and Unix-based systems it's found in /etc/hosts.
You might need administrator privileges in order to update the hosts file. Also on some systems it's hidden by default.
The structure of the file is self-explanatory, the first column is the IP address and the second column is the host name. If you use the default Scotch Box IP address and want your October installation to have october.local.com as the URL, add the following line to the file:
192.168.33.10 october.local.comSave the file and open october.local.com in a browser (Vagrant VM should be running).
Configuring MySQL desktop client
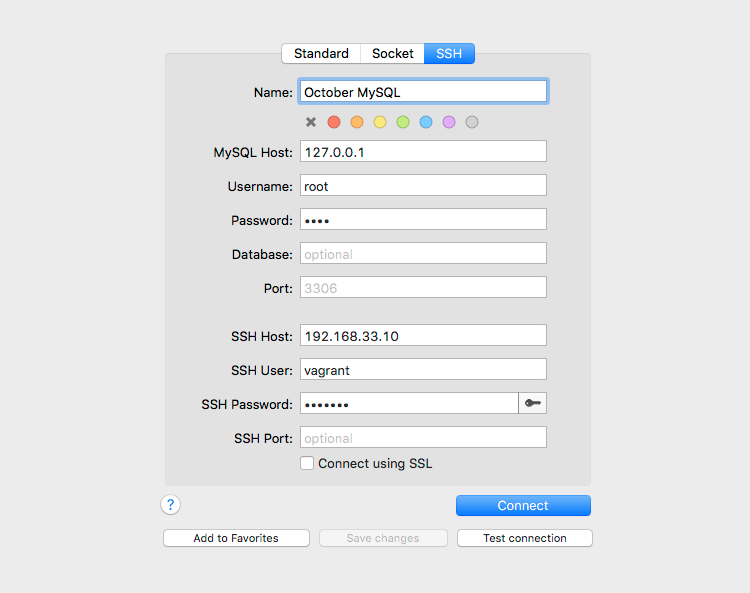
You can use any MySQL desktop client which supports SSH to work with October MySQL server running in Vagrant VM. For MacOS we prefer SequelPro. For Windows we prefer HeidiSQL. Below are connection parameters:
- MySQL host: 127.0.0.1
- Database user: root
- Database password: root
- Database: scotchbox (or leave it empty if your MySQL client allows it)
- SSH host: 192.168.33.10 (unless you changed it in Vagrantfile)
- SSH user: vagrant
- SSH password: vagrant
Conclusion
Congratulations! You have successfully installed and configured October with Vagrant. Now you can safely run projects with different system requirements on your workstation. Vagrant has much more power than we described above. If you have large projects and multiple developers we encourage you to explore Vagrant even further.
Thanks for reading. Subscribe to the email newsletter to not miss out more October tutorials!