
OAuth2 based Login plugin for Social networks.
This plugin extends the RainLab.User plugin to add social provider based logins to your web app.
Supported Providers
- Github
- Microsoft
Kindly read the documentation for detailed installation instructions for each provider. If you ever face any issues please contact me via the support link or via the contact button on my author page and I will help resolve the issue at the earliest.
Key Features
- Integrates well with RainLab.User (In fact, it's built over it)
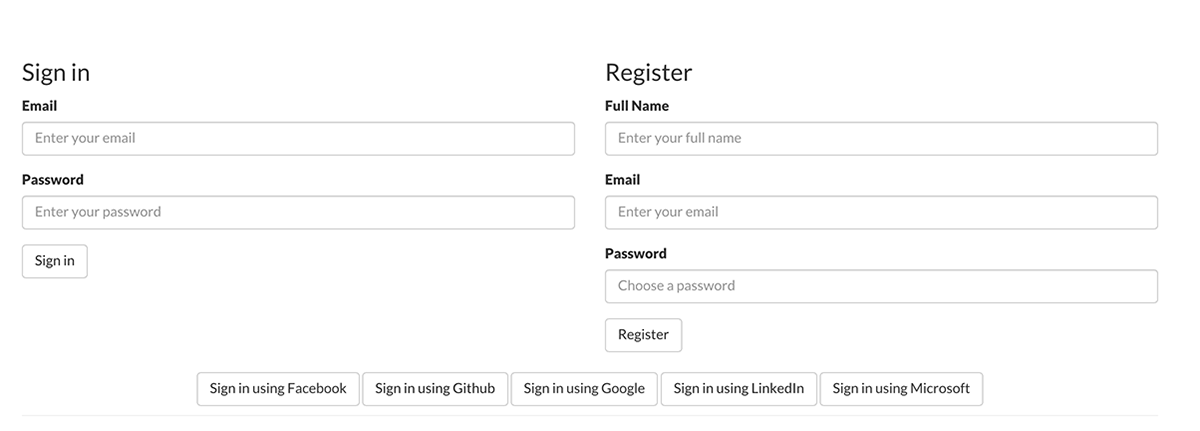
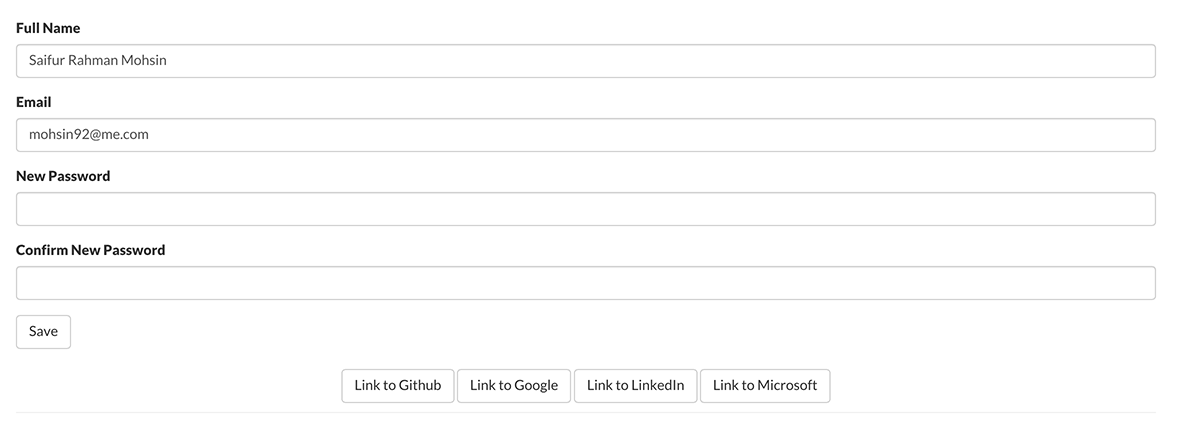
- Allows linking of social networks on existing user accounts
- Easy to configure
- Protection against Cross-Site Request Forgery attacks
- Uses Flash API to display error messages
Future Upgrades Plan
- Dynamic provider loading than statically fixed providers. This makes providers self-updateable by users.
- Support for dynamic user attribute than email-only.
- Custom repo loading for loading custom providers.
NOTE: These are my plans and it does not guarantee an upgrade, so they are likely to change.
Limitations
- The 5 official providers are statically loaded through composer. This means that they are bound to the versions mentioned in the composer file of the plugin’s latest version and maybe a bit older than the latest official version. To overcome this I make updates the version numbers periodically.
- Currently uses email as the unique login attribute. This is also why I haven’t added Twitter as an OAuth provider as it does not return the user’s email.
Known Issues
- If using the Apache web server with 'mod_security' enabled, it may block OAuth 2 requests as mentioned here. The solution would be to add an exception in the main mod_security configuration file:
SecRule REQUEST_URI "@beginsWith /<login-page-url>" "phase:1,id:12345,ctl:ruleEngine=off"
The following plugin is required


Installation via Command Line
php artisan plugin:install Mohsin.Social
Installation
After the configuration (see the next heading), you can goto your CMS page, and drop the social login button that you want into the page where you want it to appear and start using it. You can follow the same instructions as RainLab User plugin for other things, including using Session component for the Logout button as the plugin extends over that. Even the social providers can be added the same way as you do with the Account component for the RainLab user plugin. For example,
{% if user %}
    <p>Hello {{ user.name }}</p>
{% else %}
    <p>{% component 'facebook' %}</p>
{% endif %}
Configuration
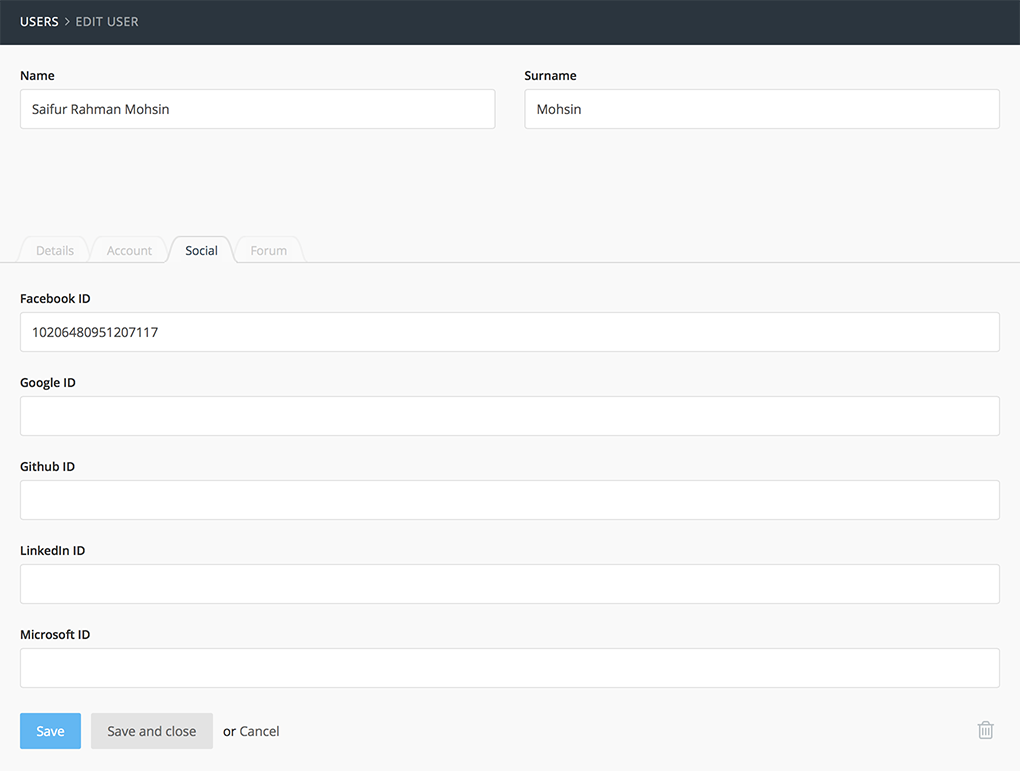
You need to enable each social network that you would like to use from the backend settings page. You will find this under Users tab as Social login settings. Enable the particular service and follow the instructions given below for each service you would like to use in your web app. Once configured you can goto your web app's login page and drag the specific Social Login component where you would like the login button to appear.
- Go to your Facebook Developers apps page and click on the name of your app. It will take you to dashboard. If it’s a new app then click Add a new app and follow the instructions (make sure the test app switch is off). If it asks from platforms, just choose website. Once the app is set up, copy the App ID and App Secret into the Facebook settings in the backend social login settings page.
- In your facebook app’s dashboard, under the products section, click Add product and it will take you to Product Setup page. Add Facebook Login. This will now show up as a tab under Products section. Click on it and make sure to put the page URL of where you placed the social login button under Valid OAuth redirect URIs. For example http://mywebsite.com/login
- Click Settings (below Dashboard) and then in Basic tab, scroll down and press Add Platform, Click website and verify it has the URL of your website, otherwise fill it with the URL to your website.
- Go to Google Developers Console and select your project, otherwise create one using Create Project.
- Once the project is created, goto API Manager from the navigation bar and click Enable API. Search for the Google+ API and add it.
- Now in the side menu select the Credentials and click on Create Credentials -> OAuth Client ID. Choose the type as Web Application and give it a name such as “For website login”. Set the Authorized redirect URIs to your web app's page URL where the Google Login component is to be added and click create. It will show you the Client ID and Client Secret which should be copied into the Google tab fields in the backend social login settings page.
Github
- Go to your Github's New OAuth Application page and in the Developer Applications tab, select your project, otherwise create a new application by clicking on Register a new application.
- Set the Authorization callback URL to your web app's page URL where the Github Login component is to be added. Once the app is created copy the Client ID and Client Secret into the Github settings in the backend.
- Go to Linked’s My Applications page and select your project, otherwise create a new project by clicking on Create Application.
- Make sure that r_basicprofile, r_emailaddress and r_contactinfo permissions are set.
- Set the OAuth 2.0 Redirect URLs to your web app's page URL where the LinkedIn Login component is to be added. Set the same URL for OAuth 1.0a Accept Redirect URL and OAuth 1.0a Cancel Redirect URL as the component is included code to manage when user accepts / cancels as well. Once the app is created copy the Client ID and Client Secret into the LinkedIn settings in the backend.
Microsoft
- Go to Microsoft's Application page and select your application under Live SDK applications, otherwise create a new application by clicking on Add an app and follow the instructions. By default, the web platform would be added.
- Under web platform, set the Target Domain to your web app’s domain and the Redirect URIs to the page URL where the Microsoft Login component is to be added. Scroll to the bottom and save it. Copy the Application Id as the Client ID and Application Secrets as the Client secret into the Microsoft settings in the backend.
Errors
The plugin uses the OAuth 2 specification to perform login. Since this specification is transaction based it's possible that a broken transaction or misconfiguration might raise some Exceptions. These are translated to human readable sentences by the plugin. Some common error messages include
Invalid State
When a Cross-Site Request Forgery attack is detected this error occurs.
This login token has already been used!
This happens when a used OAuth token is attempt to be re-used. By default, a token can be used to make a single request i.e. to get the user credentials and generate a new account or link to an existing account.
Cancelled by user
In order to query the particular provider's API for user details a user is required to authorize the app to allow access to their user details. This error appears when a user fails to authorize the app.
There are other possible error messages that are generated by the provider's (Facebook, Google, etc.) API and it differs from provider to provider. The plugin outputs these error message in the web app in a human readable format that is provided by the provider itself.
Like RainLab.User plugin, this plugin also uses the Flash API of OctoberCMS to display errors. You need to add the following lines to your layout or page in a suitable location for the errors messages to appear.
{% flash %}
    <div class="alert alert-{{ type == 'error' ? 'danger' : type }}">{{ message }}</div>
{% endflash %}
-

HOLISUN SRL
Found the plugin useful on 11 Mar, 2026
I had to modify the files for the plugin to work with October4 and php8.3.
- modify the version.yaml and remove the !!! characters there.
- in components/Google.php, when creating a new user, change name to first_name and surname to last_name.
Now the plugin works perfectly.
-

Sim Boon Long
Found the plugin useful on 28 Nov, 2016
Works like a charm. The author is very responsive to providing support too.
-

Malcolm Paul
Found the plugin useful on 29 Jul, 2016
At first, we tried using the flyn_army plugin, but it was very out of date and did not work. We ended up paying for this one and so far have been pleased!
At the beginning, this plugin also had some issues. But @Saifur was very helpful and responsive. He helped us quickly fix the problem with facebook login!
There are still problems with the other social login providers; but he is working on that and based on our experience he should provide fixes soon.
While the price is a bit high, $29.90 at this time, the support and features are definitely welcome!
-

Saifur Rahman Mohsin author
Replied on 6 Sep, 2016
Thank you for the positive review. The reason for the price was my estimation based on the hours I spent building this. This plugin provides integration with 5 different services and even writing the documentation took a lot of time and is quite extensive covering all the processes to register and setup various social providers. Thanks again for purchasing my plugin, feel free to make any queries that you have for this plugin and I will try my best to assist you. Have a good day.
-


| 1.0.9 |
Bug Fix -- Google provider image was broken. Nov 28, 2019 |
|---|---|
| 1.0.8 |
Refactored and reformatted entire codebase. Jul 19, 2019 |
| 1.0.7 |
Updated all provider APIs. Nov 28, 2016 |
| 1.0.6 |
!!! Upgrade Facebook API due to deprecation. Nov 18, 2016 |
| 1.0.5 |
Improved plugin and updated all providers Jul 31, 2016 |
| 1.0.4 |
Bug fix due to October core update Jul 29, 2016 |
| 1.0.3 |
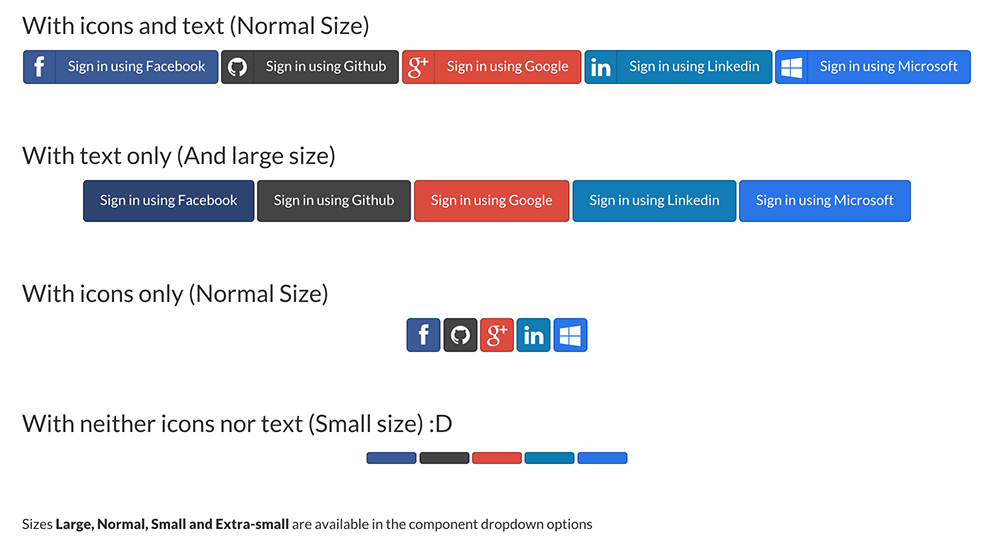
Added social icons Apr 03, 2015 |
| 1.0.2 |
Added additional user information fields Mar 29, 2015 |
| 1.0.1 |
First version of Social Mar 29, 2015 |