Building the Weather plugin
Posted in Tutorials on May 16, 2014
In this tutorial we will describe the process of building a simple Weather plugin. It demonstrates the basic principles of October extensibility. The weather information is loaded from Open Weather Map.
The plugin doesn't work with the database and doesn't implement any complex business logic. It hosts a single CMS component that displays the current weather for a specific city on a page. The component has a number of properties that could be configured either with the Component Inspector in the CMS back-end or manually, in the page template file. You can view the plugin source code or download it form the GitHub repository.
Plugin directory layout
We started with creating the rainlab/weather subdirectory in the October's plugins directory. The rainlab part is the author name and the weather is the plugin name. Every plugin requires a registration file, so we created the Plugin.php script to the plugin directory. We also created the components subdirectory for hosting the component script and partials and the assets subdirectory for storing the plugin's CSS files and images that are used for styling the weather widget on the front-end. This is the directory layout:
plugins/
  rainlab/
    weather/
      assets/
      components/
      Plugin.php
Registering the plugin
The plugin registration is done in the Plugin.php file. The Weather plugin is very simple, we only need to return the information about the plugin itself and about components it defines. The next example shows the entire contents of the Plugin.php file:
<?php namespace RainLab\Weather;

use System\Classes\PluginBase;

class Plugin extends PluginBase
{

    public function pluginDetails()
    {
        return [
            'name'        => 'Weather',
            'description' => 'Provides the local weather information.',
            'author'      => 'Alexey Bobkov, Samuel Georges',
            'icon'        => 'icon-sun-o'
        ];
    }

    public function registerComponents()
    {
        return [
           '\RainLab\Weather\Components\Weather' => 'weather'
        ];
    }
}
Building the component
The component class is defined in the Weather.php script that we added to the rainlab/weather/components directory. In the component class we prepare the information about the component, define its properties, provide methods for loading the country and state lists, inject the weatherInfo page variable and load data from the Open Weather Map API.
The next snippet shows the component registration and property definition code:
<?php namespace RainLab\Weather\Components;
use Cache;
use Request;
use Cms\Classes\ComponentBase;
use System\Classes\ApplicationException;
class Weather extends ComponentBase
{
public function componentDetails()
{
return [
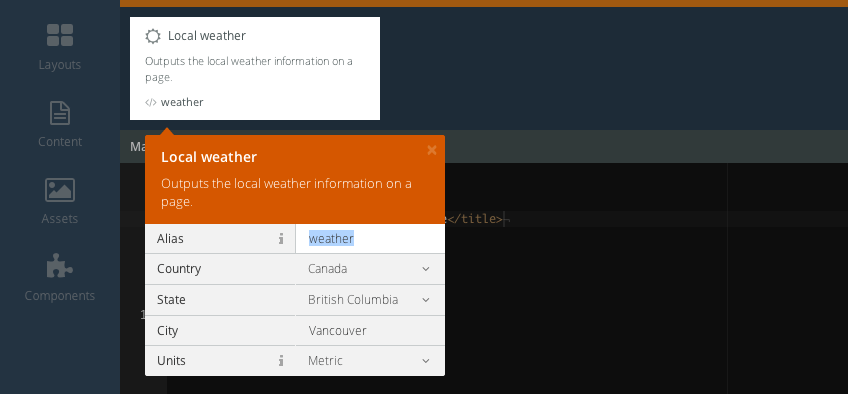
'name' => 'Local weather',
'description' => 'Outputs the local weather information on a page.'
];
}
public function defineProperties()
{
return [
'country' => [
'title' => 'Country',
'type' => 'dropdown',
'default' => 'us'
],
'state' => [
'title' => 'State',
'type' => 'dropdown',
'default' => 'dc',
'depends' => ['country'],
'placeholder' => 'Select a state'
],
'city' => [
'title' => 'City',
'type' => 'string',
'default' => 'Washington',
'placeholder' => 'Enter the city name',
'validationPattern' => '^[0-9a-zA-Z\s]+$',
'validationMessage' => 'The City field is required.'
],
'units' => [
'title' => 'Units',
'description' => 'Units for the temperature and wind speed',
'type' => 'dropdown',
'default' => 'imperial',
'placeholder' => 'Select units',
'options' => ['metric'=>'Metric', 'imperial'=>'Imperial']
]
];
}
...
}
?>The most interesting part here is the defineProperties() method. As the name suggests it defines the component properties that could be configured with the Component Inspector. The country, state and units properties are drop-down lists. The units drop-down list is static - its options are pre-loaded when Inspector displays. Options for the country and state lists are loaded from the server, and the state list depends on the current country - when the current country changes the state list updates.
To provide the dynamic loading of the country and state options we must define the getCountryOptions() and getStateOptions() methods in the component class. For the simplicity we load the country and state list from a JSON file that we put to the data/countries-and-states.json file.
protected function loadCountryData()
{
    return json_decode(file_get_contents(__DIR__.'/../data/countries-and-states.json'), true);
}

public function getCountryOptions()
{
    $countries = $this->loadCountryData();
    $result = [];

    foreach ($countries as $code=>$data)
        $result[$code] = $data['n'];

    return $result;
}

public function getStateOptions()
{
    $countries = $this->loadCountryData();
    $countryCode = Request::input('country');
    return isset($countries[$countryCode]) ? $countries[$countryCode]['s'] : [];
}
The getStateOptions() method extracts the selected country code from the POST data. The Inspector POSTs the property values when it requests the dynamic option list from the server.
The remaining part in the component is loading the weather information from Open Weather Map. It's done with the info() method that loads the component property values and builds a URL string. It uses the file_get_contents() function to request the JSON file, parses it and returns the parsed object:
public function info()
{
    $json = file_get_contents(sprintf(
        "http://api.openweathermap.org/data/2.5/weather?q=%s,%s,%s&units=%s",
        $this->property('city'),
        $this->property('state'),
        $this->property('country'),
        $this->property('units')
    ));

    return json_decode($json);
}
The onRun() method calls the info() method and injects the weatherInfo variable to the Twig environment. It also injects a the weather.css file to the page:
public function onRun()
{
    $this->addCss('/plugins/rainlab/weather/assets/css/weather.css');
    $this->page['weatherInfo'] = $this->info();
}
The final part of the component is the default component partial. The partial just uses the weatherInfo variable:
<div class="weather-widget">
{% if weatherInfo.message %}
    <p class="error">{{ weatherInfo.message }}</p>
{% else %}
    <div class="container icon-{{ weatherInfo.weather[0].icon }}">
        <h3>{{ weatherInfo.name }}</h3>
        <p class="temp">{{ weatherInfo.main.temp }} °</p>
        <p class="description">{{ weatherInfo.weather[0].main }}</p>
    </div>
{% endif %}
</div>
That's it! The component can now be used on a page. As the component injects the CSS file, the {% styles %} tag is required (unless you don't want to use the default styling). Example page:
title = "Weather"
url = "/weather"

[weather]
country = "ca"
state = "bc"
city = "Vancouver"
units = "metric"
==
<!DOCTYPE html>
<html>
    <head>
        <title>Weather component example</title>
        {% styles %}
    </head>
    <body>
        {% component 'weather' %}
    </body>
</html>