Widgets
Widgets are self-contained blocks of functionality that solve different tasks. Widgets always have a user interface and a back-end controller (the widget class) that prepares the widget data and handles AJAX requests generated by the widget user interface.
# Generic Widgets
Widgets are the back-end equivalent of front-end Components. They are similar because they are modular bundles of functionality, supply partials and are named using aliases. The key difference is that back-end widgets use YAML markup for their configuration and bind themselves to Backend pages.
Widget classes reside inside the widgets directory of the plugin directory. The inner directory name matches the name of the widget class written in lowercase. Widgets can supply assets and partials. An example widget directory structure looks like this:
├── widgets
|   ├── form
|   |   ├── partials
|   |   |   └── _form.htm <== Partial File
|   |   └── assets
|   |       ├── js
|   |       |   └── form.js <== JavaScript File
|   |       └── css
|   |           └── form.css <== StyleSheet File
|   └── Form.php <== Widget Class
# Class Definition
The generic widget classes must extend the Backend\Classes\WidgetBase class. As any other plugin class, generic widget controllers should belong to the plugin namespace. Example widget controller class definition:
namespace Backend\Widgets;

use Backend\Classes\WidgetBase;

class Lists extends WidgetBase
{
    /**
     * @var string A unique alias to identify this widget.
     */
    protected $defaultAlias = 'list';

    // ...
}
The widget class must contain a render() method for producing the widget markup by rendering a widget partial. Example:
public function render()
{
    return $this->makePartial('list');
}
To pass variables to partials you can either add them to the $vars property.
public function render()
{
    $this->vars['var'] = 'value';

    return $this->makePartial('list');
}
Alternatively you may pass the variables to the second parameter of the makePartial() method:
public function render()
{
    return $this->makePartial('list', ['var' => 'value']);
}
# AJAX Handlers
Widgets implement the same AJAX approach as the back-end controllers. The AJAX handlers are public methods of the widget class with names starting with the on prefix. The only difference between the widget AJAX handlers and backend controller's AJAX handlers is that you should use the widget's getEventHandler method to return the widget's handler name when you refer to it in the widget partials.
<a
    href="javascript:;"
    data-request="<?= $this->getEventHandler('onPaginate') ?>"
    title="Next page">Next</a>
When called from a widget class or partial the AJAX handler will target itself. For example, if the widget uses the alias of mywidget the handler will be targeted with mywidget::onName. The above would output the following attribute value:
data-request="mywidget::onPaginate"
# Binding Widgets to Controllers
A widget should be bound to a back-end controller before you can start using it in a back-end page or partial. Use the widget's bindToController method for binding it to a controller. The best place to initialize a widget is the controller's constructor. Example:
public function __construct()
{
    parent::__construct();

    $myWidget = new MyWidgetClass($this);
    $myWidget->alias = 'myWidget';
    $myWidget->bindToController();
}
After binding the widget you can access it in the controller's view or partial by its alias:
<?= $this->widget->myWidget->render() ?>
# Form Widgets
With form widgets you can add new control types to the back-end forms. They provide features that are common to supplying data for models. Form widgets must be registered in the Plugin registration file.
Form Widget classes reside inside the formwidgets directory of the plugin directory. The inner directory name matches the name of the widget class written in lowercase. Widgets can supply assets and partials. An example form widget directory structure looks like this:
├── formwidgets
|   ├── colorpicker
|   |   ├── partials
|   |   |   └── _colorpicker.htm <== Partial File
|   |   └── assets
|   |       ├── js
|   |       |   └── colorpicker.js <== JavaScript File
|   |       └── css
|   |           └── colorpicker.css <== StyleSheet File
|   └── ColorPicker.php <== Widget Class
# Class Definition
The form widget classes must extend the Backend\Classes\FormWidgetBase class. As any other plugin class, generic widget controllers should belong to the plugin namespace. A registered widget can be used in the back-end form field definition file. Example form widget class definition:
namespace Backend\Widgets;

use Backend\Classes\FormWidgetBase;

class ColorPicker extends FormWidgetBase
{
    /**
     * @var string A unique alias to identify this widget.
     */
    protected $defaultAlias = 'colorpicker';

    public function render() {}
}
# Form Widget Properties
Form widgets may have properties that can be set using the form field configuration. Simply define the configurable properties on the class and then call the fillFromConfig method to populate them inside the init method definition.
class DatePicker extends FormWidgetBase
{
    //
    // Configurable properties
    //

    /**
     * @var bool Display mode: datetime, date, time.
     */
    public $mode = 'datetime';

    /**
     * @var string the minimum/earliest date that can be selected.
     * eg: 2000-01-01
     */
    public $minDate = null;

    /**
     * @var string the maximum/latest date that can be selected.
     * eg: 2020-12-31
     */
    public $maxDate = null;

    //
    // Object properties
    //

    /**
     * {@inheritDoc}
     */
    protected $defaultAlias = 'datepicker';

    /**
     * {@inheritDoc}
     */
    public function init()
    {
        $this->fillFromConfig([
            'mode',
            'minDate',
            'maxDate',
        ]);
    }

    // ...
}
The property values then become available to set from the form field definition when using the widget.
born_at:
    label: Date of Birth
    type: datepicker
    mode: date
    minDate: 1984-04-12
    maxDate: 2014-04-23
# Form Widget Registration
Plugins should register form widgets by overriding the registerFormWidgets method inside the Plugin registration class. The method returns an array containing the widget class in the keys and widget short code as the value. Example:
public function registerFormWidgets()
{
    return [
        \Backend\FormWidgets\ColorPicker::class => 'colorpicker',
        \Backend\FormWidgets\DatePicker::class => 'datepicker'
    ];
}
The short code is optional and can be used when referencing the widget in the Form field definitions, it should be a unique value to avoid conflicts with other form fields.
# Loading Form Data
The main purpose of the form widget is to interact with your model, which means in most cases loading and saving the value via the database. When a form widget renders, it will request its stored value using the getLoadValue method. The getId and getFieldName methods will return a unique identifier and name for a HTML element used in the form. These values are often passed to the widget partial at render time.
public function render()
{
    $this->vars['id'] = $this->getId();
    $this->vars['name'] = $this->getFieldName();
    $this->vars['value'] = $this->getLoadValue();

    return $this->makePartial('myformwidget');
}
At a basic level the form widget can send the user input value back using an input element. From the above example, inside the myformwidget partial the element can be rendered using the prepared variables.
<input id="<?= $id ?>" name="<?= $name ?>" value="<?= e($value) ?>" />
# Saving Form Data
When the time comes to take the user input and store it in the database, the form widget will call the getSaveValue internally to request the value. To modify this behavior simply override the method in your form widget class.
public function getSaveValue($value)
{
    return $value;
}
In some cases you intentionally don't want any value to be given, for example, a form widget that displays information without saving anything. Return the special constant called FormField::NO_SAVE_DATA derived from the Backend\Classes\FormField class to have the value ignored.
public function getSaveValue($value)
{
    return \Backend\Classes\FormField::NO_SAVE_DATA;
}
# Report Widgets
Report widgets can be used on the back-end dashboard and in other back-end report containers. Report widgets must be registered in the Plugin registration file.
You can easily scaffold a report widget using the
create:reportwidgetcommand. See scaffolding commands for more information.
# Report Widget Classes
The report widget classes should extend the Backend\Classes\ReportWidgetBase class. As any other plugin class, generic widget controllers should belong to the plugin namespace. The class should override the render method in order to render the widget itself. Similarly to all backend widgets, report widgets use partials and a special directory layout. Example directory layout:
├── reportwidgets
|   ├── trafficsources
|   |   └── partials
|   |       └── _widget.htm <== Partial File
|   └── TrafficSources.php <== Widget Class
Example report widget class definition:
namespace RainLab\GoogleAnalytics\ReportWidgets;

use Backend\Classes\ReportWidgetBase;

class TrafficSources extends ReportWidgetBase
{
    public function render()
    {
        return $this->makePartial('widget');
    }
}
The widget partial could contain any HTML markup you want to display in the widget. The markup should be wrapped into the DIV element with the report-widget class. Using H3 element to output the widget header is preferable. Example widget partial:
<div class="report-widget">
    <h3>Traffic sources</h3>

    <div
        class="control-chart"
        data-control="chart-pie"
        data-size="200"
        data-center-text="180">
        <ul>
            <li>Direct <span>1000</span></li>
            <li>Social networks <span>800</span></li>
        </ul>
    </div>
</div>
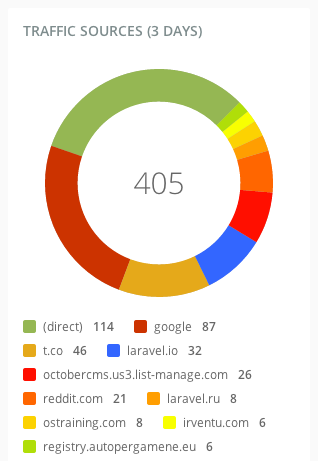
Inside report widgets you can use any charts or indicators (opens new window), lists or any other markup you wish. Remember that the report widgets extend the generic back-end widgets and you can use any widget functionality in your report widgets. The next example shows a list report widget markup.
<div class="report-widget">
    <h3>Top pages</h3>

    <div class="table-container">
        <table class="table data" data-provides="rowlink">
            <thead>
                <tr>
                    <th><span>Page URL</span></th>
                    <th><span>Pageviews</span></th>
                    <th><span>% Pageviews</span></th>
                </tr>
            </thead>
            <tbody>
                <tr>
                    <td>/</td>
                    <td>90</td>
                    <td>
                        <div class="progress">
                            <div class="bar" style="90%"></div>
                            <a href="/">90%</a>
                        </div>
                    </td>
                </tr>
                <tr>
                    <td>/docs</td>
                    <td>10</td>
                    <td>
                        <div class="progress">
                            <div class="bar" style="10%"></div>
                            <a href="/docs">10%</a>
                        </div>
                    </td>
                </tr>
            </tbody>
        </table>
    </div>
</div>
# Report Widget Properties
Report widgets may have properties that users can manage with the Inspector:
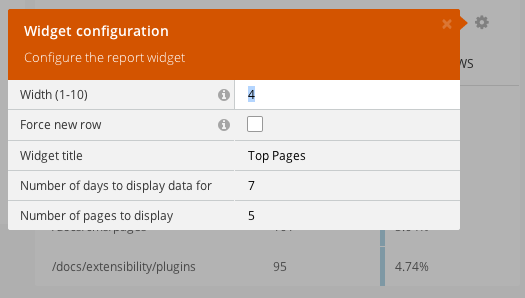
The properties should be defined in the defineProperties method of the widget class. The properties are described in the components article. Example:
public function defineProperties()
{
    return [
        'title' => [
            'title' => 'Widget title',
            'default' => 'Top Pages',
            'type' => 'string',
            'validationPattern' => '^.+$',
            'validationMessage' => 'The Widget Title is required.'
        ],
        'days' => [
            'title' => 'Number of days to display data for',
            'default' => '7',
            'type' => 'string',
            'validationPattern' => '^[0-9]+$'
        ]
    ];
}
# Report Widget Registration
Plugins can register report widgets by overriding the registerReportWidgets method inside the Plugin registration class. The method should return an array containing the widget classes in the keys and widget configuration (label, context, and required permissions) in the values. Example:
public function registerReportWidgets()
{
    return [
        \RainLab\GoogleAnalytics\ReportWidgets\TrafficOverview::class => [
            'label' => 'Google Analytics traffic overview',
            'context' => 'dashboard',
            'permissions' => [
                'rainlab.googleanalytics.widgets.traffic_overview',
            ],
        ],
        \RainLab\GoogleAnalytics\ReportWidgets\TrafficSources::class => [
            'label' => 'Google Analytics traffic sources',
            'context' => 'dashboard',
            'permissions' => [
                'rainlab.googleanaltyics.widgets.traffic_sources',
            ],
        ]
    ];
}
The label element defines the widget name for the Add Widget popup window. The context element defines the context where the widget could be used. October's report widget system allows to host the report container on any page, and the container context name is unique. The widget container on the Dashboard page uses the dashboard context.